Video is a powerful tool for engaging website visitors. It can be used to communicate…
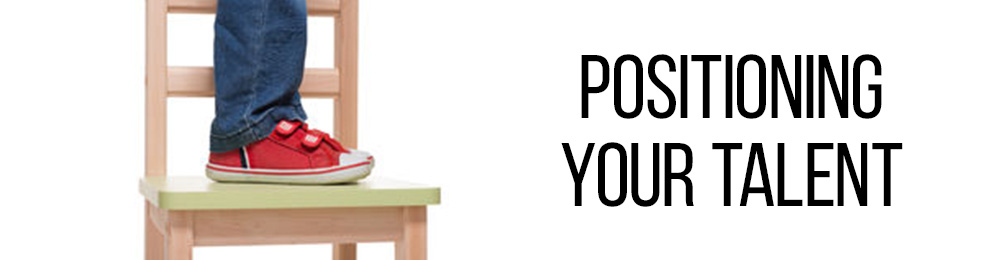
Positioning Your Talent
Another week, another exciting article where you learn helpful tips and tricks about setting up interviews! It’s a testament to how much goes into videography and films in general, as an interview comparatively is one of the easiest shots to create that uses talent. And speaking of your talent, this week we’re focusing on them… or at least the direction they’re facing. Yes, even this little detail can make or break the shot, separating the good interviews from the great ones. There are a couple easy points to remember when it comes to getting your talent properly positioned.
We’ve spoken about the importance of lighting, and about testing that light before your talent arrives on set. All very important, but the time has come to get them into position. So let’s break this down into some more manageable tips. Each one plays an important role in making both the shot and the actor look good.
The first is something many don’t think about, but it can be one of the most crucial decisions you make when setting up the shot, and that is the choice… of seating. Many people look around set and grab whatever chair is readily available. This might seem like a good idea, but it can lead to real problems. Sometimes chairs can look good to the eye, but read horribly on camera. High-back chairs, big recliners, and other chairs like those are typically very comfortable, but have a bad habit of engulfing the talent. It can make them look small or surrounded, or worse encourage bad posture. All of these lead to a shot where the talent isn’t looking their best. No matter how much work you do to set up the scene correctly, it can all be destroyed by a bad chair.
Because of this, we recommend using simple chairs with low backs, or even stools which do not have a back at all. The goal is to keep it as subtle as possible. The chair you end with may not be the most comfortable, but try to remember that the talent’s comfort isn’t the goal, but rather to get the shot. A chair which doesn’t distract and encourages good posture will pay dividends in the end. If they ask to switch the seat for something more comfortable, you should be accommodating, but you can always offer the creative direction of why you made the choice that you did. In the end, it will come down to whether they prefer the quality of the video for their posterity, or the level of comfort of their posterior.
“https://wemakevideos.wpengine.com/wp-content/uploads/2017/07/Bad-Chair.png”
Bad Cumbersome Chair
“https://wemakevideos.wpengine.com/wp-content/uploads/2017/07/Good-Chair.png”
Good Low Profile Chair
Next on the agenda for proper positioning is talent facing, or rather the direction they should be looking with regards to the camera. If the shot calls for them to be looking into the lens, as if speaking directly to the audience, then there is no issue to be faced. However, if they are being interviewed with someone asking questions, it is far more common for them to be looking past the lens. When the shot calls for this setup, you have to break down how to position them based on a few factors. Depending on whether they are framed camera left or camera right (where they are positioned within the camera frame), they should always be looking towards the opposite side. So if the talent is sitting on the right side of the frame, they should be looking toward the left edge of the frame. This means that all three points of the triangle: the interviewer, the talent, and the camera must be placed correctly to allow this. If you start with the two people, they should be set up facing one another. This is the base of the triangle. Now, if you’re wanting your talent to appear to on the right side of the frame, you’ll want to position the camera to the interviewer’s right. This will frame the talent to the right, while keeping their attention toward the interviewer drawn to left. The same rules apply to the inverse, but setting the camera on the left side of the interviewer. In either case, you create a triangle with the placements.
“https://wemakevideos.wpengine.com/wp-content/uploads/2017/07/talent-lighting-diagram.png”
Talent and Lighting Diagram
The last point we’ll cover today is about dynamic body positioning. This is not a mandatory point, but it will help to make the talent look better, and it’s a very simple trick. The goal to to help the talent appear more visually interesting, which we do by create asymmetry. How do we do this without being distracting? Easy. We simply rotate the talent’s chair slightly, typically favoring the position of the camera. What this does is point’s the talent’s body toward the camera, which will then cause them to turn their head slightly to face the interviewer. This should be a very sight rotation, as you don’t want them looking too much to their side. But if done correctly, the body will slightly favor the camera, while the face favors the interviewer. It allows the talent to look… well, more dynamic. If you want a more formal rationale, it opens the talent to both of the other points of the triangle simultaneously. Again, this is not something that must be done, but can add a whole level of depth to the look of the shot, rather than having a head on conversation which is being recorded. It gives a subliminal indication that the audience (the camera’s perspective) is welcomed as a part of the conversation. Just remember to keep it subtle.
And there you have it. Simple tactics that help your talent look their best on camera. Of course there are more elements which play contributing roles, but this series is meant to focus on what you can do while setting up the interview, which are effective and easy to implement. These three tips and tricks help position your talent to achieve the best look with minimal work involved. Don’t forget that you’ll always have minor tweaks to make with your lighting, and often they’ll happen just before you roll. Make sure the Edge light it hitting them correctly, and when you combine all of the work we’ve discussed in this series thus far, you’ll have a well crafted scene from front to back. Now all that’s left is the camera. Next week we’ll start to take a look at how depth of field works in an interview.
Until next time!
Related Posts